이번 글에서는 WPF에서 특정 이벤트가 발생하거나 사용자에게 물어볼 때 사용할 수 있는 Dialog를 버튼 개수에 따라 Dialog를 생성할 수 있는 Utility Class를 만들었습니다.오픈소스 프레임워크로 Caliburn.Micro를 사용해서 만들었습니다. MVVM 패턴에 익숙하시다면 사용하시는 데는 큰 무리가 없을 겁니다.
Dialog 모양 같은 경우에는 개발자가 원하는 대로 만들어서 사용할 수 있게 xaml 파일은 따로 첨부하지 않았습니다.

목차
1. 실제 코드 구현부
1-1. CommonMessageBox.cs
namespace Program
{
    public class CommonMessageBox
    {
        private readonly IWindowManager windowManager;
        private readonly ShellViewModel shellViewModel;


        #region Constructor
        public CommonMessageBox() {
            windowManager = IoC.Get<IWindowManager>("IWindowManager");
            shellViewModel = IoC.Get<ShellViewModel>("ShellViewModel");
        }
        #endregion


        #region Property
        //다이얼 로그 타입 (에러, 정보 등 표시)  - enum 값
        public E_MessageType MessageType { get; set; }
        #endregion


        #region Public Method

        //type 1 (버튼 1개 다이얼로그)
        public static void Show(E_MessageType messageType, string content)
        {
            var messageBox = new CommonMessageBox();
            var screen = CommonDialogViewModel.GetInstance();

            screen.Init(messageType, content);
            screen.Parent = messageBox;

            messageBox.shellViewModel.IsBlock = true;
            bool? ret = messageBox.windowManager.ShowDialog(screen, null, null);
            messageBox.shellViewModel.IsBlock = false;

        }

        //type 2 (버튼 2개 다이얼로그)
        public static bool ShowQuestion( string content, string btnText1 = "확인", string btnText2 = "취소")
        {
            var messageBox = new CommonMessageBox();
            var screen = CommonDialogViewModel.GetInstance();

            screen.Init(content, btnText1, btnText2);
            screen.Parent = messageBox;

            messageBox.shellViewModel.IsBlock = true;
            bool? ret = messageBox.windowManager.ShowDialog(screen, null, null);
            messageBox.shellViewModel.IsBlock = false;

            if (ret == true)
            {
                return true;
            }
            else
            {
                return false;
            }
        }

        //type 3 (버튼 3개 다이얼로그)
        public static void ShowQuestion(string content, out string result, params string[] names)
        {
            var messageBox = new CommonMessageBox();
            var screen = CommonDialogViewModel.GetInstance();
            result = "";

            screen.Init(content, names);
            screen.Parent = messageBox;

            messageBox.shellViewModel.IsBlock = true;
            messageBox.windowManager.ShowDialog(screen, null, null);
            messageBox.shellViewModel.IsBlock = false;

            result = screen.ResultName;

        }

    #endregion

}
}
1-2. CommonDialogViewModel.cs
해당 부분의 xaml 파일은 원하는 방향으로 Custom해서 사용하시면 됩니다.
namespace Program.ViewModels
{
    public class CommonDialogViewModel : Screen
    {

        private readonly IEventAggregator eventAggregator;


        #region Properties

        public string MessageType { get; set; }
        public string Message { get; set; }

        public string ButtonText1 { get; set; }

        public string ButtonText2 { get; set; }

        public string ButtonText3 { get; set; }

        public Action ButtonAction1 { get; set; }
        public Action ButtonAction2 { get; set; }
        public Action ButtonAction3 { get; set; }

        public string ButtonRatio1 { get; set; }
        public string ButtonRatio2 { get; set; }
        public string ButtonRatio3 { get; set; }

        public string ButtonWidth1 { get; set; }
        public string ButtonWidth2 { get; set; }
        public string ButtonWidth3 { get; set; }

        public string ResultName { get; set; }

        public int TimerCount { get; set; }

        public bool TimerVisibility { get; set; }

        #endregion

        #region Constructor


        public static CommonDialogViewModel GetInstance()
        {
            return (CommonDialogViewModel)IoC.Get<Screen>("CommonDialogViewModel");
        }

        public CommonDialogViewModel(IEventAggregator eventAggregator)
        {
            this.eventAggregator = eventAggregator;
        }

        #endregion

        #region Activiate View
        protected override void OnActivate()
        {
            Console.WriteLine(@"OnActivate");
            eventAggregator.Subscribe(this);
            base.OnActivate();
        }

        protected override void OnDeactivate(bool close)
        {
            Console.WriteLine(@"OnDeactivate");
            eventAggregator.Unsubscribe(this);
            base.OnDeactivate(close);
        }

        #endregion

        #region Public Method

        //타입 1
        public void Init(E_MessageType type ,string message)
        {
            MessageType = type.ToString();
            Message = message;
            ButtonText1 = "확인";
            ButtonAction1 = () => { TryClose(false); };

            //버튼 가로 비율
            ButtonRatio1 = "100*";
            ButtonRatio2 = "0*";
            ButtonRatio3 = "0*";

            //버튼 길이
            ButtonWidth1 = "450";
            ButtonWidth2 = "0";
            ButtonWidth3 = "0";
        }

        //타입 2
        public void Init(string message, string btnText1, string btnText2)
        {
            MessageType = E_MessageType.Question.ToString();
            Message = message;

            ButtonText2 = btnText2;
            ButtonText1 = btnText1;

            ButtonAction1 = () => {  TryClose(true); };
            ButtonAction2 = () => {  TryClose(false); };

            //버튼 가로 비율
            ButtonRatio1 = "50*";
            ButtonRatio2 = "50*";
            ButtonRatio3 = "0*";

            //버튼 길이
            ButtonWidth1 = "225";
            ButtonWidth2 = "225";
            ButtonWidth3 = "0";
        }


        //타입 3
        public void Init(string Message, params string[] names)
        {
            MessageType = E_MessageType.Question.ToString();

            if(names.Length >= 3)
            {
                ButtonText1 = names[0];
                ButtonText2 = names[1];
                ButtonText3 = names[2];

                ButtonAction1 = () => { ResultName = names[0]; TryClose(true); };
                ButtonAction2 = () => { ResultName = names[1]; TryClose(true); };
                ButtonAction3 = () => { ResultName = names[2]; TryClose(true); };
            }

            //버튼 가로 비율
            ButtonRatio1 = "33*";
            ButtonRatio2 = "33*";
            ButtonRatio3 = "33*";

            //버튼 길이
            ButtonWidth1 = "140";
            ButtonWidth2 = "140";
            ButtonWidth3 = "140";

        }

        public void Action1()
        {
            ButtonAction1();
        }

        public void Action2()
        {
            ButtonAction2();
        }

        public void Action3()
        {
            ButtonAction3();
        }


        #endregion


    }
}
2. 타입별 결과 화면 및 사용법
2-1. 타입1
 //타입 1
 CommonMessageBox.Show(E_MessageType.Information, "변경내용이 저장되었습니다.\n 프로그램 종료 후 다시 시작해주시기 바랍니다.");

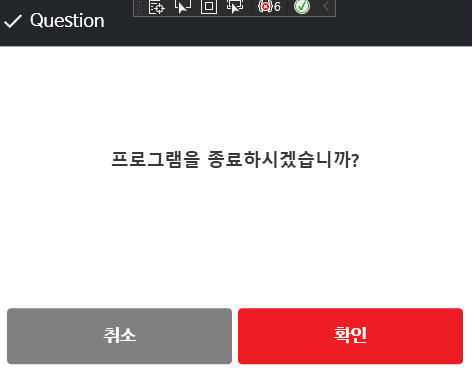
2-2. 타입2
 //타입 2
 if (CommonMessageBox.ShowQuestion("프로그램을 종료하시겠습니까?"))
 {
    //확인을 누를 시 동작
 }
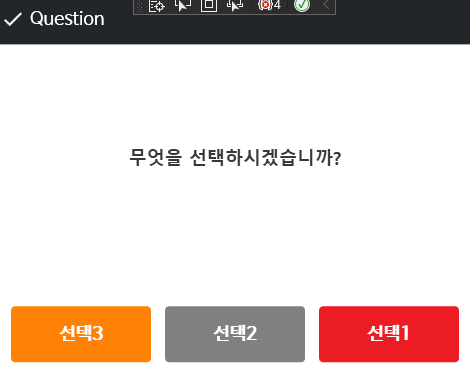
2-3. 타입3
 //타입 3

 CommonMessageBox.ShowQuestion("무엇을 선택하시겠습니까?", out string result ,"선택1", "선택2", "선택3");

 if(result == "선택1")
 {

 }else if(result == "선택2"){

 }else{

 }